Gradients. They are everywhere. From menus, to backgrounds, particle systems and even our skies - gradients are important for our games. The blending from one colour to the other goes a long way in conveying a texture, cheaply. But sadly, many beginner Unity developers sacrifice other aspects of their app when creating gradients on meshes, with no justification, by using textures instead of writing a simple shader.
So in this post (in which I am also learning how to tutorialize), I’ll show you a quick way of blending two colour together. Why is it so hard, Unity?
So how’s this shader is built?
Just a note before we begin - in order to write this shader you need to have the Shader Graph package already installed.
There are plenty of tutorials online so I won't repeat the process here, unless I make a full Shader Graph series later on.
I will just assume basic knowledge in Unity and URP/HDRP.
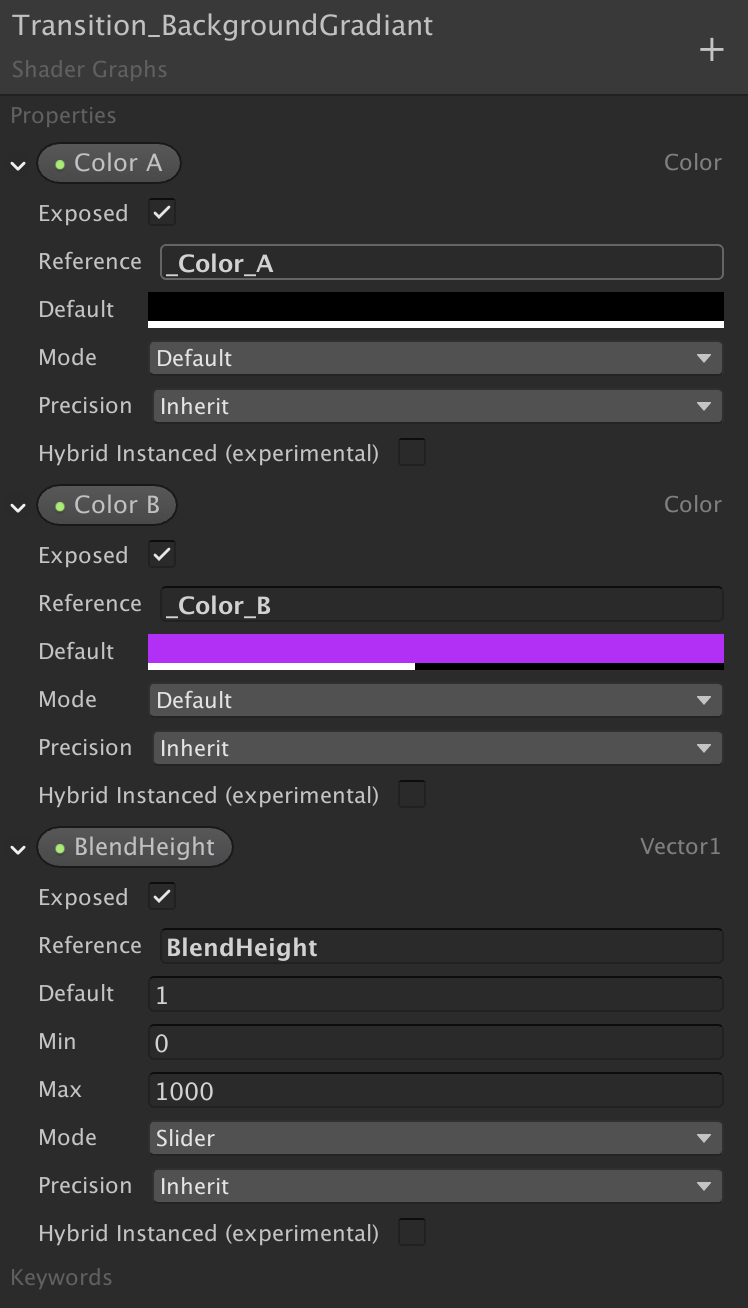
Let’s create a new shader. These are the properties I would expose - two colours to blend, and a ‘height’ parameter slider. This parameter will give us control over the colours ‘blend point’. More on that later. Exposing the values means we can animate it, change it through the material according to some other variables, environment, player settings, and everything you want.
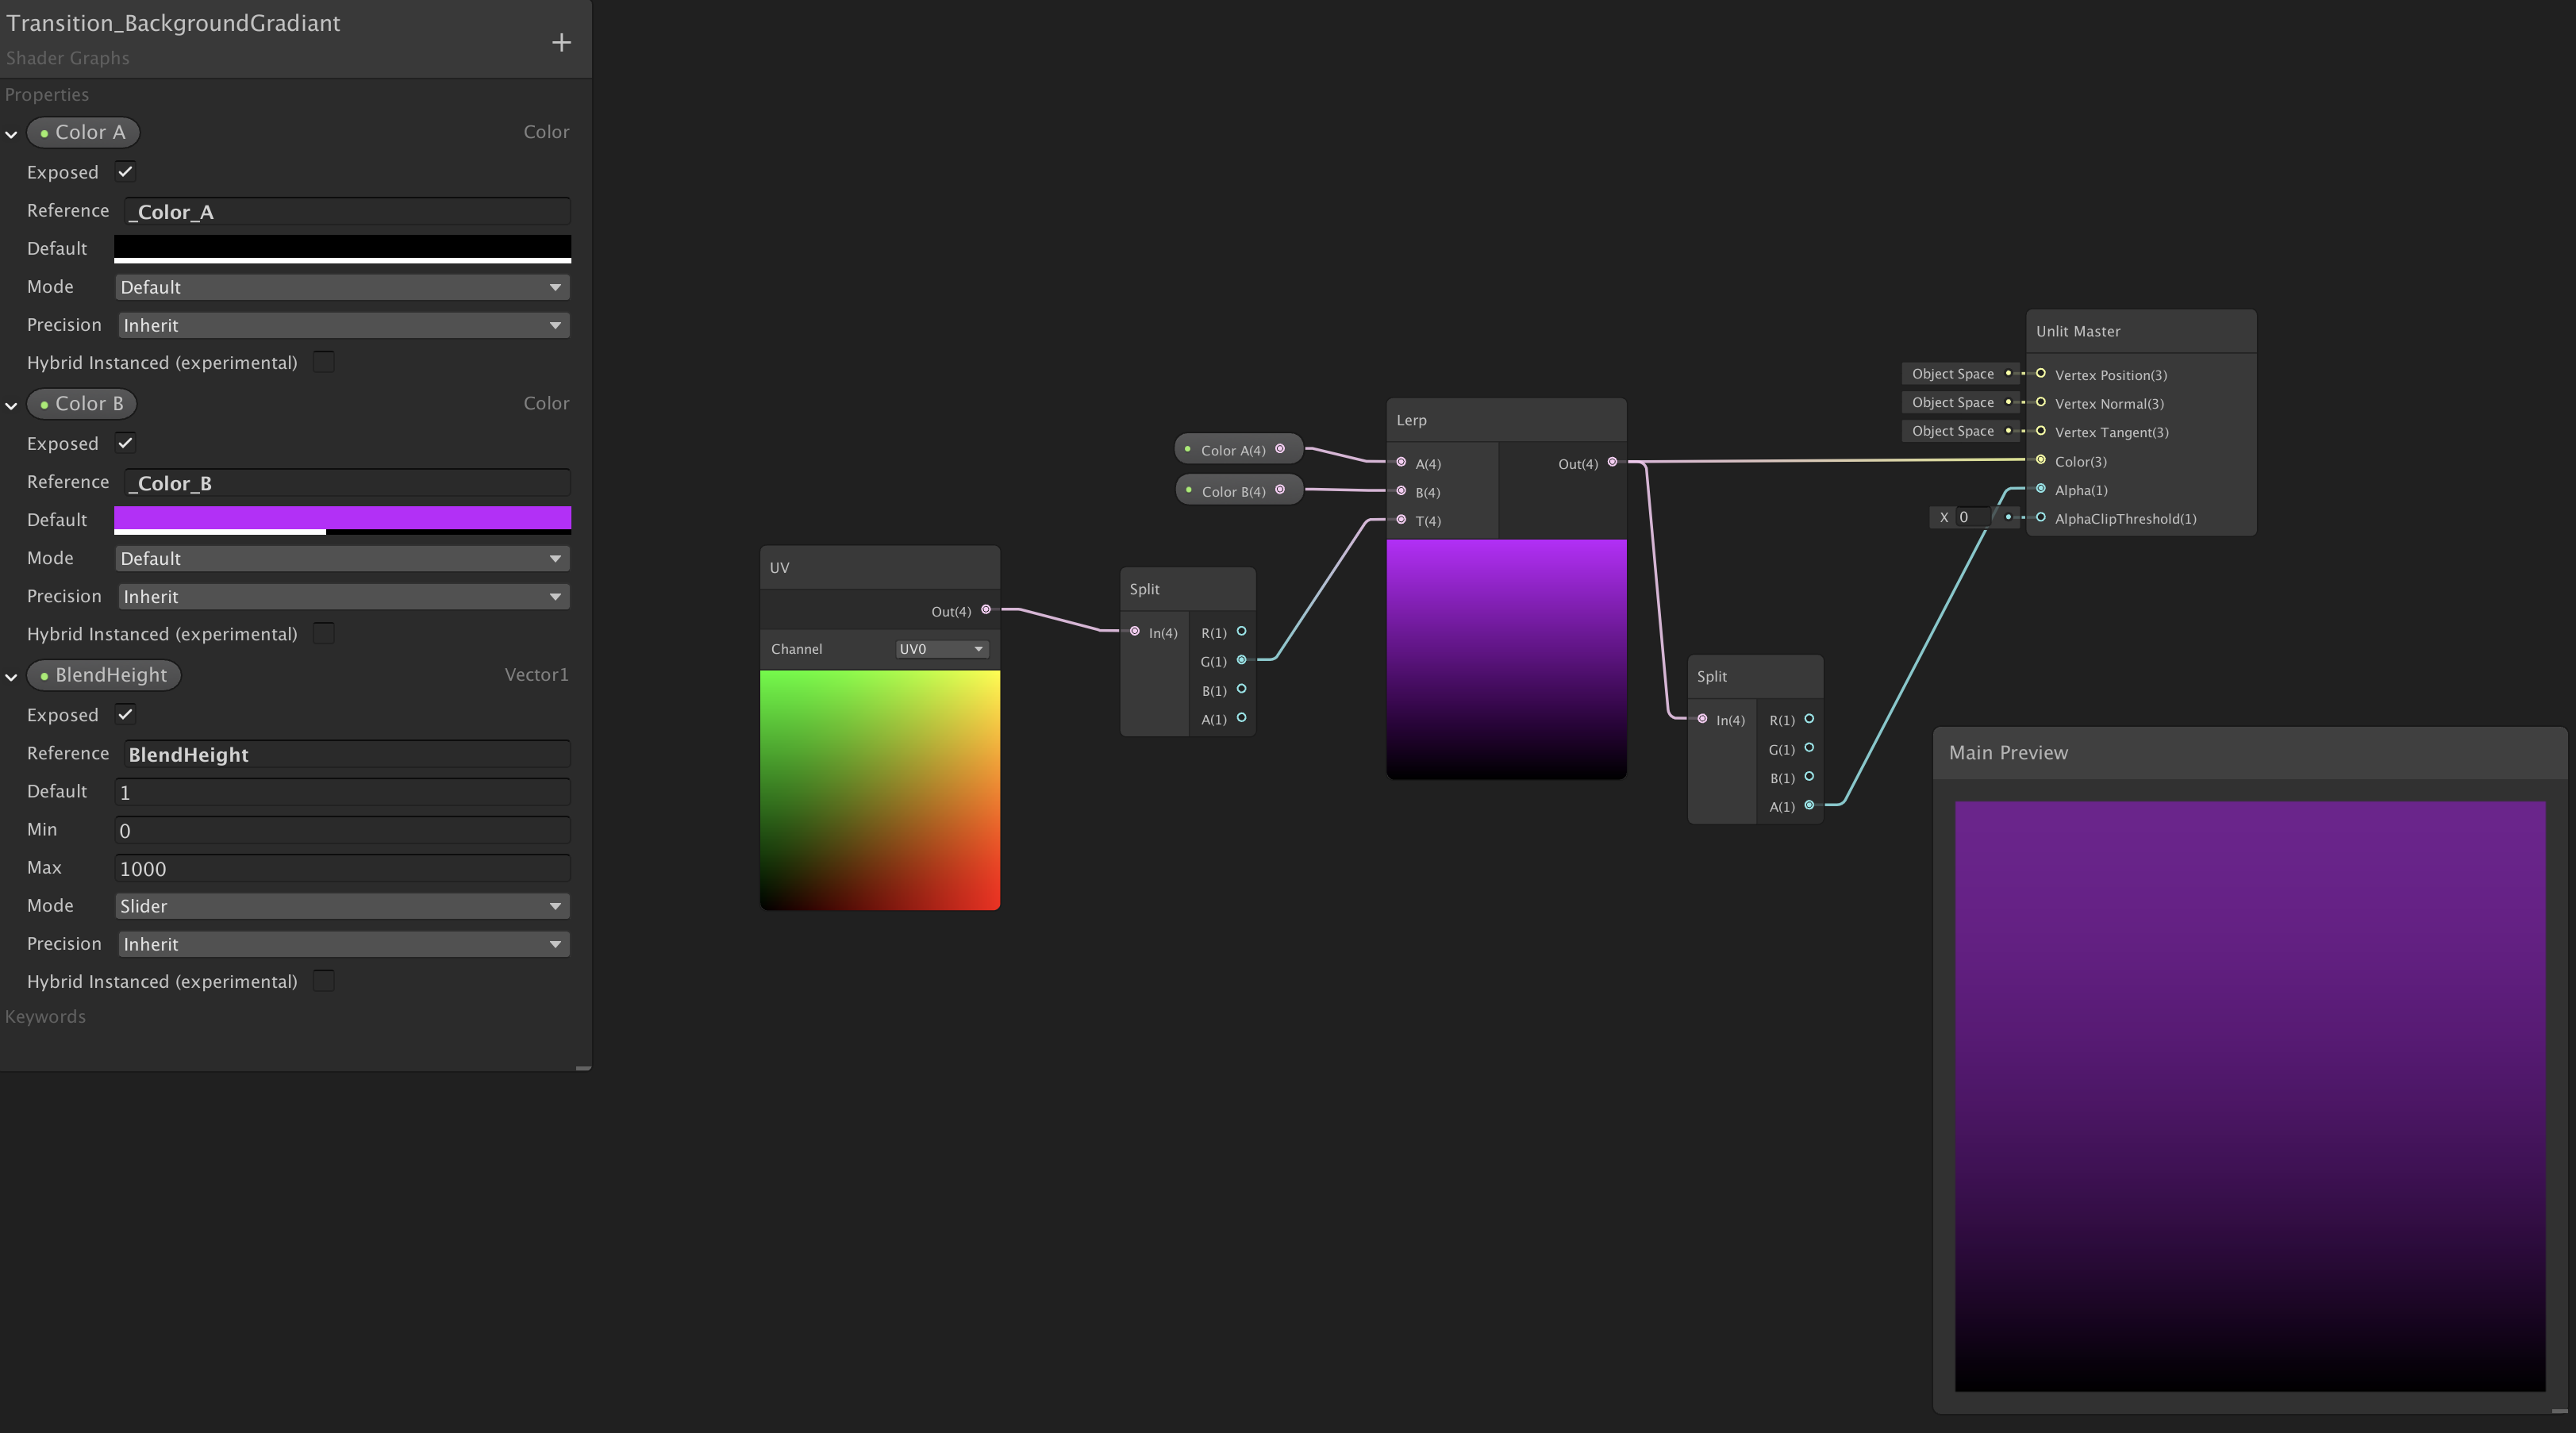
Now let’s think about how to colour each pixel. Each pixel should get his colour based on his location across an axis (in this example - the Y axis, but you could use any axis). The property we’ll use for this is of course its UV values. You can check here the great explenation and visualization by CodeMonkey. So, we will sample the colours and use the Lerp Node according to the UV value of our pixel. Again, in this example I want a sky gradient from black to purple. We will then also use the Alpha values of these colour. And here is the result!
Pay <3 to 2 things:
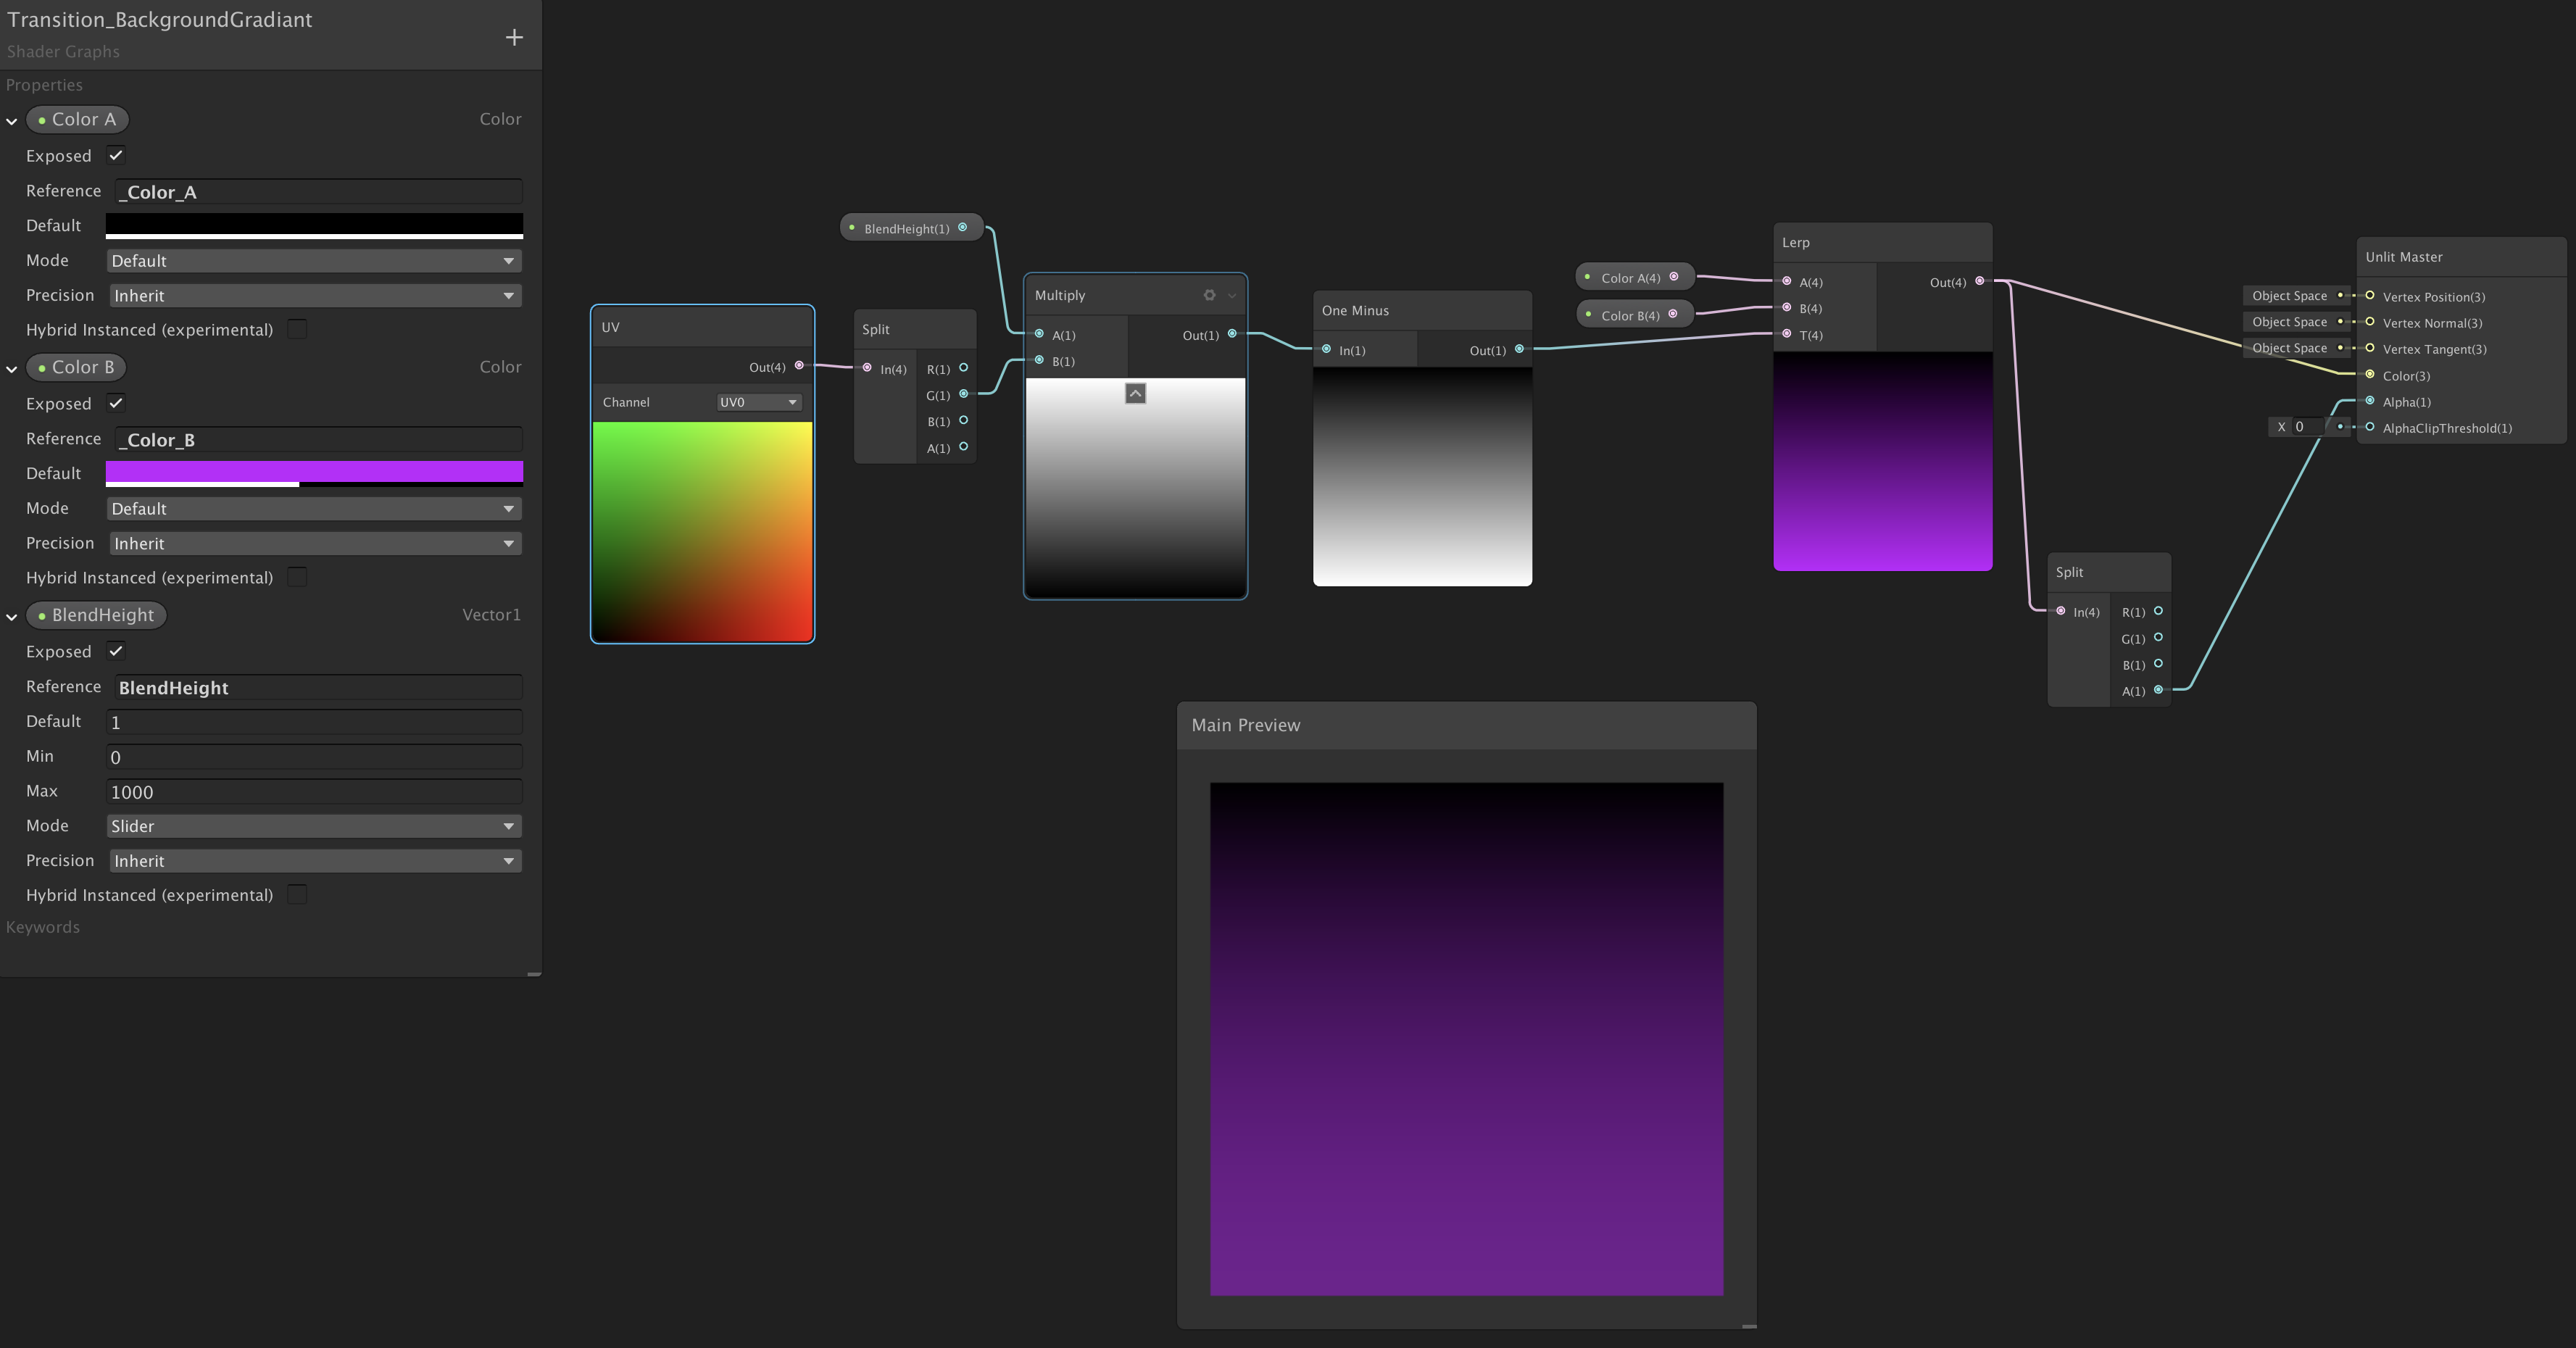
- UVs are from 0 to 1, and go ‘bottom-to-top’ on a mesh. So our direction is messed up. Nothing a one-minus node can’t fix!
- We are still missing the ‘height’ control we want. While there are many ways of achieving this, I would just multiply the UV value with the height value, which gives me good results. A value of 1 will give me mid-point blend, value of 2 - a 0.75 blend, etc, etc… You could achieve the same with range-mapping, but for my needs this is quite enough (I work with an artist who want to play with a slider)
These are the final result:
You can also enhance the shader to make some ‘animations’ very easily but scrolling the uv values a bit with Time nodes or something like that. Use all axis! Get Creative!
Alternatives to using this Shader:
-
Adding a pre-blended texture as a texture. If you’ve used Unity’s Memory Profiler at any capacity before, you’ll understand just how many memory space textures take. Even if you’re using sprite atlases to save draw calls, (like you should), this will take a toll on you overall performance. It is also not as flexible - you can’t change a texture’s colour during runtime as easily, so every colour or height change would mean an additional chunk of memory dedicated to another texture. Also, creating a texture ‘commits’ you to a size in which the texture will look crisp. That’s a shame!
-
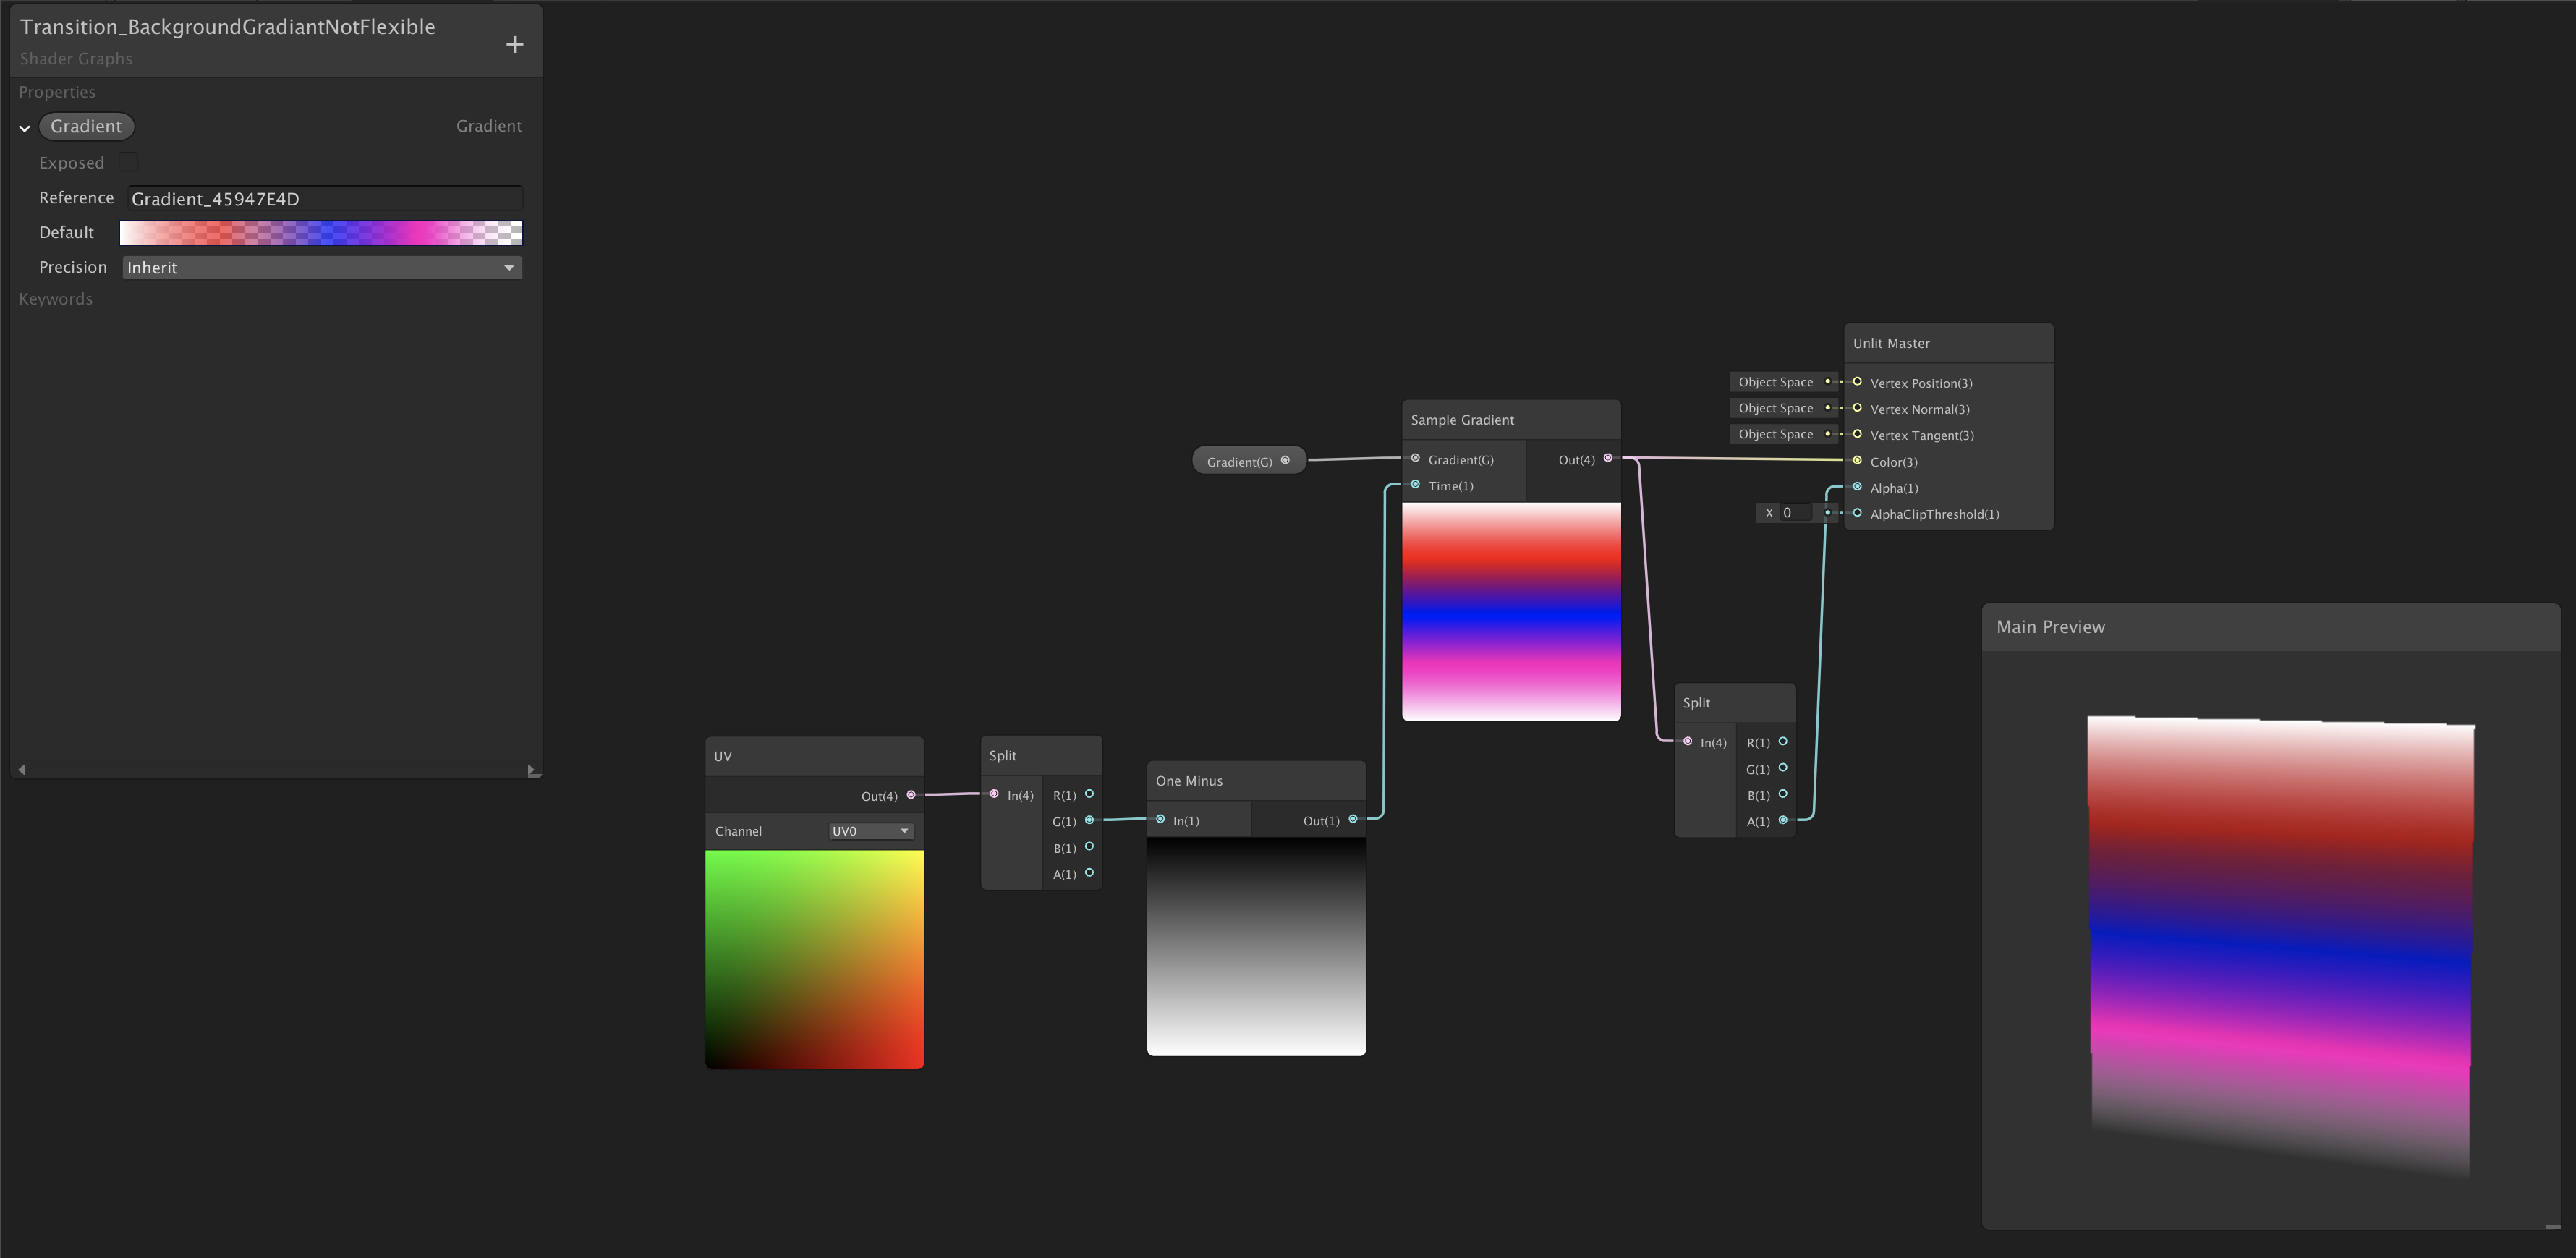
Using the ‘Gradient’ shader graph node.
A recent update brought the Gradient class into shader graph as a variable! This means we can now use the built-in Graph Sample Node to create complex gradients! This simplifies the shader in case we’ll need more than 2 colours. Not everything is perfect though. I use Material Property Blocks in my projects (expect a post on these soon enough); I’ve yet to figure out a way to change the Gradient for a specific material from runtime through MPB. There is simply no SetGradient method, yet (at least one that I’m aware of). So I would say that if you are quite sure your gradients will be set ‘in stone’, you could use this. It’s much better than textures anyway :)
A gradient-based graph would look like this:
Cons for using this shader
The only major downside for using this shader is increasing the draw calls number if you’re using this shader in just one material of one game object. This will break batching :(
The solution? Integrate this into your ‘standard’ shader! We’ll talk more about it in the Material Property Block post series.
In conclusion
Shaders are fun! And performant! And hard, sometimes… :(
Trying to get into shader programming while I’m into my 30s with a job and other responsibilities is challenging, since it’s an endless time-sink. But I feel like writing about the journey publicly could be inspiring to me at least. TIll next time!